Sunday, September 30, 2018

Organizing and Storing Clear Cling Stamps and Wood-backed Rubber Stamps

Wood stamps have many storage options, but one I like best is the Totally-Tiffany Stamp, Store, and Go Bag.  You can buy it single-sided or double-sided.  It's a great way to organize stamps because you can see through to find your stamp quickly.


But what do you do with the clear cling stamps?  With a little experimentation, we found the perfect low-cost solution.


Materials:
Cling stamps
Binder
Pocket protectors
Transparency sheets
Paper
Stamp Pad

As teachers, my art teacher friend Lynn, have all these leftover transparencies we didn't know quite what to do with.  Luckily, the cling stamps stick to them just like they do acrylic blocks.  If you don't have any, ask a teacher friend.  They might just have some sitting around.

We stamped the images onto cardstock, but any paper will do.  It's just a reference to easily determine which stamps you are storing.  It's not always easy with the clear ones!

We put the transparency and stamps on the paper and slipped them into the pocket protectors and VOILA!  Cheap organized storage!

Wednesday, May 3, 2017

Why you really should wait for sales

It's obvious that waiting for larger purchases really pays off, but by how much?  Why not just impulsively buy all your supplies now?  The pictures speak for themselves.  Each set of beads cost me about $30.

Michaels had a 60% off green label beads and 50% off others.  $32 for 12 strands of beads!  A majority are semi-precious gems & stones or silver-plated.

I returned the next day, but the sale was over.  I paid about $30 but only got 5 strands.  

Today Michaels had an amazing promotion:  buy 1 green label bead strand and get two free!  Ridiculously good!  I spent about $31 and got 12 strands.

Saturday, June 25, 2016

Dragonfly beaded bracelet

These seed beads were sitting around waiting to be made into something, as was this dragon fly charm.


The charm began as a scarf embellishment, but after squishing it down a little, it fit perfectly for my bracelet.  Sadly, I was out of affordable wire; however, I did have plenty of beading string.  So instead of crimp beads, I employed knotting to keep it together.  Although I wanted 4-5 strands, the dragonfly allowed only for 3.


Saturday, August 22, 2015

Come see my new Etsy shop!  Right now you can get 20% off any purchase over 15% with coupon code PHILANTHROPIST.  You can feel good for supporting a local artist and a college student!


Thursday, December 4, 2014

What to Do When You Run Out of Beads!

So you stocked up on some awesome beads you found on sale, yet you still don't have enough for your project.  It's a frustrating scenario that happens too often.  Luckily, there are ways to get around it besides turning your necklace project into a bracelet project instead.

Not only will it help you build a nice necklace that requires fewer beads, but using chain will also lay very nicely with your design.  Plus, when your curb chain is thinner in diameter than your beads, you'll actually achieve a more lengthened look for your neckline.  Since my Thanksgiving pounds have added up, I relish this thinning idea!


In my project, I realized I hadn't purchased enough of this bead blend.  Luckily, I had some gun-metal colored chain, complete with findings.  I simply added 3 inches of chain on either side of each strand and voila!  It turned out looking nice and professional.  Add this to my new blue blouse and I have a gorgeous ensemble for tomorrow's work day!

Wednesday, November 26, 2014

Amazing Hawaiian Cork Board

I've been wanting a cork board for a long time, but they are so plain and bland.  I finally decided I had to bite the bullet because I really need one in my craft room.  So after Googling cool boards, I decided to try a technique with scrapbook paper.  My daughter came with me to Hobby Lobby and helped me pick out the colors.

We were looking for a design that would look good with my hanging ukuleles and the vintage Hawaiian travel posters I just ordered.  Josie even reminded me of a cool way to turn buttons or scrapbook brads into tacks for our project.  We picked up the paper, tacks, buttons, and washi tape, ready to add to the craft room!

Here's what we bought:

We trimmed the paper and hot glued the buttons to the tacks (after cutting off the shanks).  I love what we have now!


Monday, November 10, 2014

Never throw away toilet paper rolls!

After my last project making color pencil organizers, I contemplated the importance of collecting rolls from toilet paper and paper towels.  Yep, I'm a crafter.  And as any crafter knows, you may not need it now, but in the long term, you'll be sorry if you toss out the *trash*!

 With 3 various junk drawers filled with tangled cords and god only knows what else, having a place where I can find a charger without a 30 minute search is such a relief!  So where does one find such a thing?

I did what any craft whore would do:  I jumped on Pinterest. There were a range of solutions, most of which involved going to the hobby store.  Normally I'm all for it, but having felt under the weather all day, I needed something I could find around the house.  And sure enough, some clever connoisseur of craftiliciousness had developed just the remedy I sought!

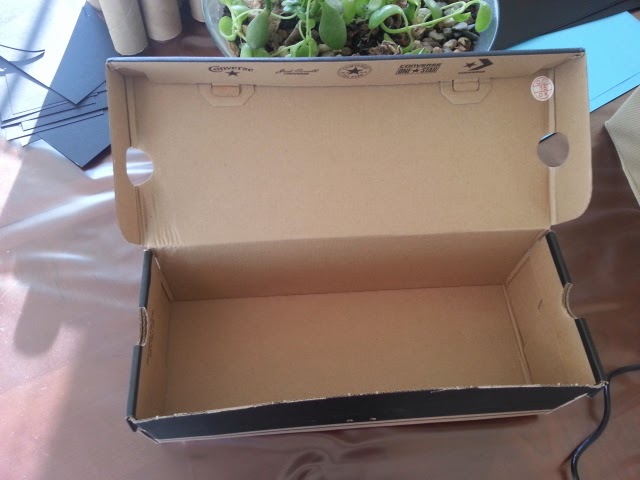
Armed with a shoebox, black scrapbooking paper (my kitchen appliances are all black), and toilet paper rolls, I jumped right in.

Tip:  use regular tape on the outside of the toilet paper rolls and fold the top over like you might with giftwrap.  In fact, a lovely wrapping paper would have been a much easier and decorative alternative.

Voila:


Tip #2:  when you fold up cords, make sure to put them in so the tip is showing.  This way you know what the cord is supposed to charge!