Sunday, September 19, 2021

How to Convert Rubber Stamps to Cling Stamps

  Technically, cling stamps are made from a different material than wood-backed rubber stamps, but if you're looking to make the change, it's relatively easy.


Why on earth would you want to do this?

First, it saves a lot of space.  In fact, I think it takes up only a third of the space that wood-backed stamps take when you include the side of the binder you put them in.

Stamp Platform

Second, if you like using a stamp platform toget precision stamping, you need to get them off the wood.  

Third, it's easy to organize them into categories for storage.


You'll need

  • A microwave
  • A thin knife or craft knife
  • A cup of water
  • Wood-backed Stamps
  • Acetate, transparency, or glossy photo paper
  • Cheap sheet protectors
  • A cheap binder
  • Patience
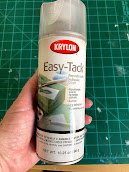
  • Optional: Easy-Tack removable adhesive

Instructions 
First, put your cup of water in the microwave.  Then place your stamp either wood side down or on its side.  I like to wet the stamp first to avoid having it dry out.

Then set the time on the microwave.  
For small stamps, I used about 10 seconds.  
Medium got about 15.  
Large was close to 19 seconds.  

It's better to err on the side of caution and use less time.  You can always put it in for a little longer.  

It just needs to be warm enough to loosen the adhesive holding it on the wood block.  
Remember, all microwaves are different, so you may have to adjust the timing.  

Once I removed it from the microwave, I used my thinnest knife to pull up the edges all the way around the stamp.  

From there, I was usually able to carefully peel the stamp off of the wood.  Again, you can always zap it for a few more seconds if it's being difficult.

When I had finished pulling all the stamps off the wood blocks, I then put them onto the acetate.  When I ran out of acetate, I used glossy photo paper.  These then went into the sheet protectors and then into the binder.

For stamps that don't have any stick to them, you can spray a little Easy-Tack or a comparable adhesive to get them sticky.

Tips
Put down wax or pastry paper.  Stamps will be sticky.

If you get the Easy-Tack on your hands, you can get it off with petroleum jelly.  I found that rubbing alcohol and soap weren't helpful.

Remember to peel the stamp off the wood carefully.  It's best to go a little slow and peel from several different angles.

All stamps will be a little different to work with based on age, use, and materials.

To remove Easy-Tack from your hands, use petroleum jelly.  I tried rubbing alcohol and dish soap, but they were no match for the power of Easy-Tack.


All the remaining wood! 
That's a lot of storage space saved!

Luckily. all this wood will be recycled as I will be giving it to a friend who does a lot of wood working.

Tuesday, September 1, 2020

Organizing Polymer Clay

After looking through different organizers, I realized that if I didn't want to spend a ton of money, I would need to figure it out myself.  I needed small containers that would fit a brick of clay, and containers that could seal well so the clay doesn't dry out.

Solution!  I used Ziplock 4oz square containers, printed labels with my Brother label maker, and stuck them all in a covered tub from Target. I used 24 containers for the different colors I had.

I turned them upside down to make it easier to see the color.  Of course, I had help!

Total cost?  Just under $12!


Wednesday, March 6, 2019

Winsor & Newton versus Dr. Ph. Martin's Radiant Water Color Paints

Last year I purchased a very pricey set of Dr. Ph. Martin's Radiant water colors.  My art teacher friend had a set and I loved working with them. 

Dr. Ph. Martin's Radiant Concentrated Water Color, 0.5 oz, Set of 14 (Set B)
Having just bought a travel set of Winsor & Newton, I decided to do a comparison by making a color chart for each set.


I was pleasantly surprised that the Martin's were so vibrant. 

Both are an excellent purchase, but if you just need something small and easy to transport, the Winsor & Newton set is probably the way to go, especially because it's a lot less expensive. 

However, there are only a few colors in the travel set.  If you do a lot of painting, the Dr. Ph. Martin's might be a good way to go, especially if you can order online and use a coupon, like I did.  You can also purchase them individually from Amazon.


Sunday, March 3, 2019

Winsor & Newton Sketcher's Pocket Box Water Colours

Winsor & Newton Cotman Water Colour Paint Sketchers' Pocket Box, Half Pans, 14-Pieces


I couldn't resist this adorable little box of half-pan watercolor paints, and with a 40% off Hobby Lobby coupon in tow, I was out the door having only spent about $15. 


Considering one tube of the paint costs $10, this was a bargain and a great way to sample their paints.


To get a feel for the consistency, vibrancy, and mixing of the colors, I created a color chart:


Pros: 
Creamy, smooth colors are easy to mix and feel amazing to work with.
The brush that comes with it is an excellent round brush that is perfect for detail work or just getting color on the canvas.
The pack is small and easy to slip into a purse or art bag.

Cons:
Not much.  You'll just have to find a water source.

Sunday, October 7, 2018

Make Your Own Paper for Alcohol Inks

Yupo is a type of nonporous paper used with alcohol inks.  Unfortunately, it is costly, especially if you just want to use it for experimenting.  I've heard of using photo paper, but I had just given my stash away.  *Sigh* 
I decided to try to make my own paper out of stuff I had already bought.


I brushed some Liquitex Gloss Medium & Varnish over some cardstock.  

It didn't take very long to dry and created a nice gloss effect on the paper.  You can definitely see the brush marks, which could be used to advantage if you want more texture in your design.
It also tends to make the paper warp a bit.


Despite these possible flaws, it did work well with the alcohol inks.


Top Right:  one of the treated papers with Piñata inks.  

Bottom right: a treated paper with homemade inks.  They are a little more transparent.  

Left: a sheet that is not treated.  On the top are the Piñata inks.  On the bottom are the homemade inks.

Verdict:  They worked great!  You can't really see the brush marks once the ink is on, but that might be due to the colors I used. 
The curling paper could likely be fixed by sticking it in a heavy book when it's try to flatten it out.

Wednesday, October 3, 2018

Tim Holtz Travel Stamp Platform Review

When I first saw this used in a stamping video, I checked Amazon and was instantly turned off by the price.  My friend Lynn, however, bought one.  Being an art teacher, she is more justified in dropping $25 on equipment.  Even though I wasn't going to buy it, after using hers, I saw the advantage instantly.


Anyone who has ever stamped and imaged then tried to stamp over it can attest to the impossibility of getting it right.  Consider this problem:

I just received these from Amazon, but they were a bit warped.  Not a good image.
Using this tool, I could re-ink the stamps and try again without creating a weird ghost image.


Not perfect, but way better.  Again, the stamps were a little warped to begin with.

I like that the set come with two powerful magnets that hold the paper so it doesn't shift when stamping.  I didn't want to drop $25 at first, but now, I'm seriously glad I did.


I love that you can position the stamps right onto the paper, which eliminates any guess work.


Drop the little acrylic lid down and it picks up the stamps right where you want them.


Ink right on the stamp.


Easy and effective!


Sunday, September 30, 2018

Organizing and Storing Clear Cling Stamps and Wood-backed Rubber Stamps

Wood stamps have many storage options, but one I like best is the Totally-Tiffany Stamp, Store, and Go Bag.  You can buy it single-sided or double-sided.  It's a great way to organize stamps because you can see through to find your stamp quickly.


But what do you do with the clear cling stamps?  With a little experimentation, we found the perfect low-cost solution.


Materials:
Cling stamps
Binder
Pocket protectors
Transparency sheets
Paper
Stamp Pad

As teachers, my art teacher friend Lynn, have all these leftover transparencies we didn't know quite what to do with.  Luckily, the cling stamps stick to them just like they do acrylic blocks.  If you don't have any, ask a teacher friend.  They might just have some sitting around.

We stamped the images onto cardstock, but any paper will do.  It's just a reference to easily determine which stamps you are storing.  It's not always easy with the clear ones!

We put the transparency and stamps on the paper and slipped them into the pocket protectors and VOILA!  Cheap organized storage!